What to Know About Your Credit Before Buying a Home

Top Home Finance Tips from a Top Money Coach

Credit score paperwork

It’s not just whether you pay your bills on time that matters.

Image: Danielfela/Depositphotos

Workable Wealth logo

This article was contributed by financial expert and blogger Mary Beth Storjohann, CFP, author, speaker, and founder of Workable Wealth. She provides financial coaching for individuals and couples in their 20s to 40s across the country, helping them make smart, educated choices with their money.

Like it or not, your credit score is one of the most important numbers in your life, ranking up there with your Social Security number, date of birth, and wedding anniversary. This three-digit number is your financial report card, except there’s no getting rid of it after college.

Your credit score shows lenders just how trustworthy you are when it comes to managing your finances, and it can either save or cost you thousands of dollars throughout your life.

If you’re in the dark about just how significantly this number can impact you and the details behind your personal score, here’s an overview of what you need to know before hitting the mortgage application process.

How Your Score is Calculated

Your FICO credit score is comprised of five elements, according to the Fair, Isaac Corp.

  1. 35% of your score is attributed to how you pay your bills. Points are added for paying on time and deducted for late or missing payments. Note: This is a big portion of your score, so if you’re not paying bills on time, it’s best to get that under control pronto.
  2. 30% of your score is based on your credit utilization ratio. Translation: How much money do you owe as a portion of the amount of credit available to you? The lower this ratio, the better.
  3. 15% is based on the length of your credit history. When did you open your first account (and is it still open)?
  4. 10% of your score goes to the type of credit you have. Think revolving credit (such as credit cards) and installment credit (such as car loans and mortgages).
  5. The last 10% is impacted by new credit applications. How often and for what types of credit are you applying?

Where to Find Your Score and Report

To access your credit report, use a website such as annualcreditreport.com, which will give you one free report a year, or creditkarma.com, which will provide you with free access to your score upon signing up for an account.

Once you have copies of your report and score, immediately look for fraudulent or erroneous information. If you find anything, immediately contact both the credit reporting agency and the company that is portraying inaccurate information to determine next steps.

How Your Score Can Cost You

Your score can range from about 300 to 850. You’ll find a variety of breakdowns on what’s considered “good” compared to “excellent” versus “poor,” but in general you’ll want to aim for a score of 720 and higher, which is the “excellent” range.

The higher your credit score, the more creditworthy you appear to lenders (meaning they can rely on you to pay your debts and pay them on time), which translates into lower interest rates and more money saved when taking out a loan.

Not sure how this can play out financially? Consider this:

Meet Claire: She’s 35, pays her credit card off in full each month, has all her bills on auto-draft, and never misses a payment. She’s had a positive credit history for 10 years and wants to buy a home. Claire was approved for a $200,000, 30-year fixed-rate loan at 3.75%.

Meet Steve: He’s 32, obtained his first credit card at age 18, ran up some debt in college that he’s still working on paying down, and has no system for keeping track of bills. He has consistent late and bounced check fees. Steve wants to buy a home and was approved for a $200,000, 30-year fixed-rate loan at 5.5%.

What’s all the fuss about if they were both approved? Over the life of her loan, Claire will pay $133,443.23 in interest. Over the life of his loan, Steve will pay $208,808.08 in interest. A small interest rate difference of 1.75% translates into $75,364.85 more paid by Steve! $75,000 is a pretty significant sum of money that could be used toward other goals.

Having a solid credit score is one of the most financially savvy tools for you to have on hand when it comes to buying a home. When managed wisely, your credit score will bring you confidence, peace of mind, and more money saved via low interest rates.

When mismanaged or not cared for at all, your credit score can delay your success in meeting financial goals and result in additional funds and resources spent correcting past mistakes.


Looking to buy or sell a home?

Chris Lee and Rusty’s Team at RealtySouth 205-233-5183


team photos

© Copyright 2018 NATIONAL ASSOCIATION OF REALTORS®

How Your Taxes Are Changing if You’re a Homeowner

No drastic changes this year. But next year is very different.

Image: Retrorocket/Getty

The sweeping tax bill signed into law just before the 2017 holidays brings changes for virtually all homeowners — but, for the most part, not until you file your 2018 tax return in 2019.

Homeowner tax deductions don’t really change for taxes due this year. So file as you normally would on April 17 (or Oct. 15, if you get an extension).

After this tax season, here’s how the new law can affect your home ownership tax benefits.

The Standard Deduction Is Going Up

Because the standard deduction has increased across the board — to $12,000 from $6,500 for single individuals and to $24,000 from $13,000 for joint returns — fewer people will have a reason to itemize. And you guessed it, to get home ownership tax benefits, you have to itemize.

If you do have enough deductions to itemize, some things have changed:

The Mortgage Interest Deduction Remains, But With a New Cap

The maximum mortgage debt on which you can deduct interest for new loans is now $750,000, not $1 million as before. Second-home mortgage interest follows the same rule.

If your mortgage existed on Dec. 14, 2017, you’re grandfathered in on the $1 million maximum. Also, you can refinance that existing mortgage and keep deducting the interest on up to $1 million of debt, so long as you don’t increase the amount you owe with the refi.


Home Equity Loan Interest Is Only Deductible for Home Improvements

If you’re planning to redo a bathroom or a kitchen or fix up a fixer-upper, the interest on new home equity loans, home equity lines of credit, and second mortgages will still be deductible, but only up to the maximum amount (for all mortgages) of $750,000. (The new rules refer to “substantial” home improvements, though the rule makers didn’t define that word. Talk to your tax pro.)

The rules no longer allow you to use home equity loans to get tax-deductible financing for such things as consumer debt and tuition.

However, if you have an existing home equity loan (approved before Dec. 15, 2017) and the proceeds were used to substantially improve your home, the interest will remain deductible, so long as you don’t exceed the total cap.

State and Local Tax Deductions Are Capped

Through 2017, these deductions were unlimited. Starting with tax year 2018, state and local taxes, including property and income or sales taxes, are capped at a total of $10,000 combined.

BTW, talk with your tax preparer if you prepaid your 2018 property taxes in 2017 in hopes of maxing out your deductions before the tax law change. Whether it’s actually deductible depends.

  • If you had a 2017 property tax bill in hand, that means the tax was assessed and you should be able to deduct it with your 2017 taxes if you itemize.
  • If your local taxing authority said it would accept prepayments, but the tax hadn’t yet been assessed — just estimated — the payment likely isn’t deductible on your 2017 tax returns.

Casualty Losses Have Been Pared Back

Casualty losses for such things as a home burglary or a fire are no longer deductible. To claim a casualty loss, the loss has to fall under a presidentially declared disaster, like a hurricane or earthquake.

Moving Expense Deductions Are Limited to the Military

Unless you’re in the military, moving expenses you pay out of pocket for a job relocation (at least 50 miles farther from your house than your current job) are no longer deductible. And you can no longer exclude employer reimbursements for moving expenses from your income.

What’s Not Changing

The capital gains exclusion on a gain on the sale of your home stays the same. When you sell your primary residence, you can make up to $250,000 in profit if you’re single, or $500,000 if you’re married, and not owe any taxes on those gains. Most people are eligible for this exclusion, but you must have lived in your home for at least two of the five years before you sell.

The student loan deduction — up to $2,500 if you’re repaying — stays put, and you don’t have to itemize to take it.

The home office deduction remains for independent contractors. But for employees who work from home, it’s been repealed.

The prepaid interest (or points) you paid when you took out your mortgage is still 100% deductible in the year you paid it, if you itemize. If you refinance your mortgage and use that money for home improvements, any points you pay are also deductible in the same year.

But if you refinance to get a better rate or shorten the length of your mortgage, or to use the money for something other than home improvements, such as college tuition, you’ll need to deduct the points over the life of your mortgage. Say you refi into a 10-year mortgage and pay $3,000 in points. You can deduct $300 per year for 10 years.

If you’re a landlord, there’s good news: Your mortgage interest and property tax deductions on your rental real estate remain unlimited.

What’s Been Gone for a While

The private mortgage insurance(PMI)deduction expired with tax year 2016. Ditto the residential energy tax credits for installing things like energy-efficient windows and doors, water heaters, furnaces, and insulation.

Congress didn’t address either of these benefits in the new tax legislation. However, it’s still possible that lawmakers may retroactively reinstate these tax benefits in 2018.


Looking to buy or sell a home?

Chris Lee and Rusty’s Team at RealtySouth 205-233-5183

A Financial Plan for Your Home

Home filing system for financial documentsImage: Ronn Campisi

To manage your biggest asset, create a financial plan that covers repairs, upgrades, mortgages, insurance, and taxes.

Do you pay each home-related expense as it comes? If so, you’re missing opportunities for upgrades, or much worse, heading into a financial crisis when a slew of surprise maintenance items hit. So take a holistic look at what it costs to operate your house and set up a home financial plan.

Use our home financial plan budget worksheet, and start by writing a list of expenses, such as:

  • Mortgage
  • Taxes
  • Home insurance, including liability
  • Repairs and maintenance, such as new furnace, roof, painting
  • Voluntary upgrades, such as a swimming pool, a premium range, a new powder room

What Will You Learn From This Home Financial Plan Weekend Exercise?

  • How much you have to spend
  • How much you need to allot in the short- and long-term for necessary maintenance and voluntary improvements

With this newfound grip on your home’s expenses, you can create a home financial plan that’ll help you there for years with maximum enjoyment and minimum anxiety.

Here’s how to manage other aspects of your home finances:

The Mortgage: Pay It — and Then Some

Yup, you already shell out a lot for your mortgage, but can you pay more? Even a little extra each month can add up to an earlier payoff. Let’s say you have $200,000 in outstanding principal and a 20-year fixed-rate mortgage at 5%. Your monthly payment is $1,319.91. But if you can manage to pay another $100 a month, you’ll save $14,887 in interest.

Run the numbers yourself for your home financial plan.

Advantages of an early payoff, says Alan D. Kahn, a financial planner in Syosset, N.Y.:

  • Less debt means more money to spend later.
  • It feels darn good to own your house outright as soon as possible.
  • Minimal tax loss. Toward the tail end of the life of a loan most of your payment goes to the principal, not the interest, so you’re getting only a small tax break anyway.

Of course, if you’re still saving for retirement, put the 100 bucks elsewhere:

  • A retirement plan
  • An account for the inevitable home repairs
  • An account for discretionary improvements, which can raise your home’s value

Insurance: Protect Your Property

Your vegetable garden is pointless without a fence to keep out rabbits; likewise, your home financial plan will come to nothing without an insurance “fence”:

Homeowner’s insurance. Basic coverage for your home and everything in it. The average cost is $636 per year but this varies widely by state.

Liability coverage. Protects you from a lawsuit if someone gets hurt on your property, for example. Your best bet: An umbrella policy.  For about $300 a year you can buy a typical $1 million policy.

Various disaster insurance policies. Optional policies cover flood, earthquake, and hurricane damage. As part of your home financial plan, you have to research to see what disaster coverage, if any, you need in your area, and what your standard policy already covers. For $540 a year you can buy flood insurance, for example Don’t Under- or Overbuy Insurance

For your basic policy, get homeowners insurance with full replacement coverage in case your house burns to the ground.

That sounds simple, but heads up on calculation. Remember that you own a house as well as the land on which it sits. So even though you bought your home for $300,000, it may cost only $100,000 to rebuild it. Your policy limits should reflect this. This difference will vary widely by region.

Another heads up: Don’t make the common and potentially disastrous mistake of thinking that because your home has fallen in value you need less insurance. If you bought a $1.2 million townhouse in Florida during the boom, it’s true it now may only sell for $600,000. But the replacement cost of the townhouse hasn’t changed much, so you can’t improve your home financial plan by cutting insurance costs that way.

Other ways to cut your insurance budget:

  • If you make structural improvements, such as adding storm shutters, your insurer may give you a break.
  • If you belong to certain groups, such as AARP or veterans’ organizations, your premiums may be lower.


Repairs and Renovations: By Choice or Necessity

You own a home, so you’ll be spending money on everything from a new faucet to — surprise! — a new roof. Freddie Mac and other authorities say as part of your home financial plan, you should be prepared to spend 1% to 3% of the market value of the home annually on maintenance. To be extra-prudent, open a savings account and make regular payments until your account reaches 1% to 3% of your home’s current value.

To help you budget:

Start with the inspection report you received when you bought the house. Did the inspector indicate that you would need a new roof in five years? A new furnace in 10?

Keep a log of your major appliances’ age so you can estimate when they’ll need replacing. Some estimated life spans:

  • Roof: 20-25 years
  • Heating systems: 15-20 years
  • Range/ovens: 11-15 years
  • Water heaters: 8-13 years

Then get estimates on what replacements will cost and start saving.

Consider ongoing non-emergency maintenance, too. Do you live in New England? Price a snow blower and get bids from plow services.

Resist the siren call of the home equity loan to take care of everything. That just defeats your efforts to pay off the mortgage early.

Separate out what you want from what you need. Believe it or not, some outdoor projects recoup more at resale than a kitchen redo.

If you can afford to redo, go for it. Just don’t confuse your necessary repairs (new oil furnace — about $4,000) with your discretionary upgrades (Viking range — $6,000 and up).

Taxes: (Almost) No Way Around Them

Even if your lender handles your property taxes from an escrow account, you need to budget for them in your home financial plan. They creep up almost every year, it seems. Take responsibility for tracking the changes in your area: Look over past tax bills to get a sense of how quickly they’ve risen in the past.

Or if your lender handles escrow and you haven’t saved your bills, ask for an accounting. The median annual property tax payment is $1,812, but that hides the enormous range in medians from state to state.

You can generally deduct property taxes on your federal return. A tax pro can tell you how much of a tax break you’ll get, to help you fine-tune your home financial plan.

You may be able to reduce your tax burden by getting a reassessment. Do your homework first: Are comparable houses taxed less than yours? Ask the local assessor what formula is used to set tax rates. You can challenge the assessed value and get yourself a rollback.

If you’re in a special group, you might get some help from state or local programs. Check around to see what’s available in your area. New York State, for example, has its Star Program for giving senior citizens some relief from school-related property taxes.

Looking to buy or sell a home?

Chris Lee and Rusty’s Team at RealtySouth 205-233-5183

team photos
© Copyright 2018 NATIONAL ASSOCIATION OF REALTORS®

8 Tips for Finding Your New Home

Couple looking at houses with a buyer's agentWhen looking for your new house, make sure to take into consideration how long you plan to stay there. Image: Thinkstock Images/Comstock/Getty Images

A solid game plan can help you narrow your homebuying search to find the best home for you.

House hunting is just like any other shopping expedition. If you identify exactly what you want and do some research, you’ll zoom in on the home you want at the best price. These eight tips will guide you through a smart homebuying process.

1.  Know thyself.

Understand the type of home that suits your personality. Do you prefer a new or existing home? A ranch or a multistory home? If you’re leaning toward a fixer-upper, are you truly handy, or will you need to budget for contractors?

2.  Research before you look.

List the features you most want in a home and identify which are necessities and which are extras. Identify three to four neighborhoods you’d like to live in based on commute time, schools, recreation, crime, and price. Then hop onto realtor.com to get a feel for the homes available in your price range in your favorite neighborhoods. Use the results to prioritize your wants and needs so you can add in and weed out properties from the inventory you’d like to view.

3.  Get your finances in order.

Generally, lenders say you can afford a home priced two to three times your gross income. Create a budget so you know how much you’re comfortable spending each month on housing. Don’t wait until you’ve found a home and made an offer to investigate financing.

Gather your financial records and meet with a lender to get a prequalification letter spelling out how much you’re eligible to borrow. The lender won’t necessarily consider the extra fees you’ll pay when you purchase or your plans to begin a family or purchase a new car, so shop in a price range you’re comfortable with. Also, presenting an offer contingent on financing will make your bid less attractive to sellers.

4.  Set a moving timeline.

Do you have blemishes on your credit that will take time to clear up? If you already own, have you sold your current home? If not, you’ll need to factor in the time needed to sell. If you rent, when is your lease up? Do you expect interest rates to jump anytime soon? All these factors will affect your buying, closing, and moving timelines.

5.  Think long term.

Your future plans may dictate the type of home you’ll buy. Are you looking for a starter house with plans to move up in a few years, or do you hope to stay in the home for five to 10 years? With a starter, you may need to adjust your expectations. If you plan to nest, be sure your priority list helps you identify a home you’ll still love years from now.

6.  Work with a REALTOR®.

Ask people you trust for referrals to a real estate professional they trust. Interview agents to determine which have expertise in the neighborhoods and type of homes you’re interested in. Because homebuying triggers many emotions, consider whether an agent’s style meshes with your personality.

Also ask if the agent specializes in buyer representation. Unlike listing agents, whose first duty is to the seller, buyers’ reps work only for you even though they’re typically paid by the seller. Finally, check whether agents are REALTORS®, which means they’re members of the NATIONAL ASSOCIATION OF REALTORS®. NAR has been a champion of homeownership rights for more than a century.

7.  Be realistic.

It’s OK to be picky about the home and neighborhood you want, but don’t be close-minded, unrealistic, or blinded by minor imperfections. If you insist on living in a cul-de-sac, you may miss out on great homes on streets that are just as quiet and secluded.

On the flip side, don’t be so swayed by a “wow” feature that you forget about other issues — like noise levels — that can have a big impact on your quality of life. Use your priority list to evaluate each property, remembering there’s no such thing as the perfect home.

8.  Limit the opinions you solicit.

It’s natural to seek reassurance when making a big financial decision. But you know that saying about too many cooks in the kitchen. If you need a second opinion, select one or two people. But remain true to your list of wants and needs so the final decision is based on criteria you’ve identified as important.

team photos

© Copyright 2018 NATIONAL ASSOCIATION OF REALTORS®

Kitchen Countertop Triage: First Aid for Scratches

Granite kitchen counter

You can repair kitchen counter mishaps with only a little time and money. Big boo-boos, however, will need professional help.

Image: Elenathewise/iStockphoto

Repair kitchen counters that show a history of wine spills, dropped pans, and unidentified sharp objects, and you’ll maintain the value of your kitchen and home. You can easily hide some counter mishaps, while only professional contractors can solve other surface problems.

Here’s a look at counter cures and lost causes.

Granite

Even granite counters suffer kitchen wear and tear. But you can make them shine with a little time and know-how. After you fix them, don’t forget to reseal them.

Cracks, chips, scratches: Fill nicks in granite by building up layers of epoxy resin colored to match the stone. Clean the area first with acetone, which breaks down grease. Be sure to open a window for ventilation.

Stains: The type of stain — wine or ink, oil or bleach — determines the type of poultice you’ll need to suck it out. A paste of flour and hydrogen peroxide pulls out grease, oil, bleach, and ink stains; a mix of flour and bleach cleans wine stains. If you want to go commercial, check out Alpha, Aqua Mix, and StoneTech stone cleaners. Cost: $6 to $20

Solid-Surface Counters

Solid-surface countertops, such as Corian, are man-made from resin, acrylic, and other materials. They’re tough but not impervious to scratches and stains. To repair minor scratches, rub a white polishing compound on the area with a wool pad, then apply a countertop wax.

For deeper scratches or cuts, call a professional. Figure labor costs at about $15 to $35 an hour. If you need to replace portions of the counter, figure at least $35 to $65 per square foot.

Laminate

Fixing gouges or covering burns in laminate is tough for mortals, though repairing minor problems is doable.

  • Fix small chips with laminate repair paste that matches the color of the countertop.
  • Cover scratches with countertop polish or car wax.
  • Fix peeling laminate with contact cement applied to both surfaces and pressed back into place.
  • Remove coffee and tea stains with vinegar or a paste of baking soda and household cleaner.

Bigger problems will require replacing the damaged stretch. Laminate comes in a billion colors, but finding an exact match for an old counter could be difficult.

To get the look you want, replace the counter. Labor will cost $15 to $35 per hour; countertops range from $3 per linear foot for Plain Jane straight-edged laminates to $100 per linear foot for laminates with a beveled edge that look like granite.


Tile

If you’ve planned ahead and stockpiled old tiles, then grab a few and replace cracked or scratched areas. If you don’t have extra tile, then attempt the following first aid:

  • Wipe away scratches with a dab of toothpaste on a clean cloth.
  • Work epoxy glue into cracks with a toothpick, then color with matching oil-based artist paint.
  • Remove old grout with a utility knife, then replace with a rubber trowel.

Stainless Steel

Stainless steel countertops become scratched, stained, and dull over time. Although you’ll never completely remove scratches, you can buff them into a warm patina by massaging with vegetable oil.

Remove stains with a paste of baking soda and dish soap. A sprinkle of Barkeeper’s Friend will remove stains without scratching.


Looking to buy or sell a home?

Chris Lee and Rusty’s Team at RealtySouth 205-233-5183


team photos

© Copyright 2018 NATIONAL ASSOCIATION OF REALTORS®

How to Prepare Your Finances for Home Ownership

Mint notebooks on a gold tray with a vase of white tulipsImage: IvoryMix.com

Tip: Tackle your high-interest-rate debt first.

financial best life logoThis article was contributed by financial expert and blogger Lauren Bowling, a recognized thought leader in the millennial finance space. A full-time online business owner, Bowling teaches others how to master their finances and create their own economy via her body of digital products, free online courses, and weekly blog content.

Preparing your finances for home ownership begins the day someone decides they actually want to buy a home. After all, saving for a down payment doesn’t just happen overnight! So, how do you best prepare your finances in advance to handle the most expensive purchase of your lifetime?

Below are five areas to tackle in order to ensure home buying success, and these steps can be completed months or years in advance of a first home purchase. To assist in preparing your finances for home ownership, use this worksheet in order to track progress and keep all of your to-dos straight.

Step #1 – Prepare Your Credit

Everyone knows good credit is needed in order to qualify for a mortgage, but preparing your credit also encompasses an important component of financially preparing for home ownership — debt payoff.

Paying off debt, especially student loans and high-interest credit cards, not only frees up money in the budget for down payment savings, it also raises your credit score by lowering your overall debt. Debt payoff is also important for lenders when determining your debt-to-income (DTI) ratio (total monthly debt payments divided by gross monthly income), the primary number lenders look at to determine how much home you’ll qualify for.

Lenders can qualify an individual with up to 43% debt-to-income ratio, though lenders are more likely to make a loan if it’s lower. The debt-to-income number is important for first-time buyers to know as many are struggling with five-figure student loan burdens, which can severely impact their DTI ratio.

The best way to tackle debt is to use the debt snowball method. List all of your debts (credit cards and student loans for now) in order of highest interest rate and throw all extra money at that amount. When this amount is gone, then go to the next one. Use the accompanying worksheet to list your debt and track your pay off status.


Step #2 – Save for a Down Payment

If you opt for a conventional mortgage and want to avoid private mortgage insurance (PMI), which protects the lender in case you default, you’d typically need to put down 20% of the purchase price. It could take years to save up the proper funds for a home down payment. This is why many buyers opt for putting down less than 20% or prefer an FHA loan, where a down payment as low as 3.5% of the purchase price is possible depending on your credit.

You’ll still need money in the bank no matter which type of loan you think you’ll go with, so it’s important to begin saving as early as possible.

Paying off debt will make saving easier over time as you’ll have more money to allocate to your down payment fund.

You may also want to consider:

  • An expense audit, where you cut subscription services and negotiate with your utility providers to lower your costs. Then you automatically put the money saved into your down payment savings account. You’ll never miss it.
  • Halting retirement savings for a period in order to contribute more to your down payment funds, but only if you feel comfortable doing so for the short term.
  • Funneling any “found” money, such as work bonuses or holiday cash, into your down payment fund. The temptation not to spend is real, but once in your new home, you’ll be glad you sacrificed.
  • Getting a side hustle. Putting even $100 extra away each month can make saving for a home much faster (and easier).


Step #3 – Prepare Your Budget

Have you thought about what your budget will look like post-closing? The expense audit (see above) will help make some room, but to see if you can truly afford a home, try building out a sample budget of what your monthly expenses will look like after you buy a home.

Mortgage calculators can help you get a rough estimate of what your monthly mortgage payment will look like. I recommend adding 2 to 3 times utility rates if upsizing from an apartment into a home.

Step #4 – Shop for a Mortgage

Rate shopping for a mortgage is an important step, so don’t go with the first rate you’re offered (unless it ends up being the most competitive, of course). Shopping for the most competitive interest rate is one of the few ways to actually save money on a home, because the lower the interest rate, the less money you’ll pay over the life of the loan.

Rate shopping is now super quick (thanks, Internet!) and doesn’t impact your credit score, so the few minutes you spend rate shopping will pay off big time for your future self … to the tune of tens of thousands of dollars.

Step #5 – Consider Closing Costs

Don’t get blindsided by closing costs — you’ll need to save for these too. Typically, you can multiply the purchase price of the home by 3% to 5% and get a rough estimate of how much you’ll need to bring to closing. Even if the seller offers to pay some (or all) of the closing costs as part of the sale, having this money in the bank – just in case – will assure the lender you’re ready to take on the responsibility of a mortgage.


team photos© Copyright 2018 NATIONAL ASSOCIATION OF REALTORS®

6 Ways to Totally Snoop the House You Want to Buy

Looking in a closet while house hunting

This checklist gives you carte blanche (well, almost) when viewing potential homes.

Image: RG&B Images/Stocksy United

Ah, house hunting. It may technically be shopping, but it can feel more like breaking and entering. Even though you know the seller wants you there, does anyone really want you traipsing through their bedroom? Or looking through their closet? Or digging around in their basement? Awwwwkward.

But here’s something that should feel weirder: buying a home without knowing absolutely everything you can about it. The only way to avoid the second awkwardness is to face the first head on. When you’re house hunting, don’t think of poking around in someone else’s home as nosiness. It’s a smart, must-do investigation.

Here are six things you should absolutely do when viewing a home — no matter how awkward it feels.

1. Soak in the Bathroom

Homebuyers tend to peer into the bathroom for as long as they’d want a stranger to examine theirs: not long at all. But this isn’t the time to be quick. Josh Myler, a REALTOR® with The Agency in Los Angeles, encourages buyers to take a long, close perusal of the water closet.

Flush the toilet to find any backups in the system, and turn on the faucets to check the water pressure. Besides being annoying during showers, low pressure can indicate problems with the plumbing.

“Water pressure can really cause headaches down the line if you don’t dig in before you make an offer,” says Myler.

But always, always check with your agent first. In some markets, or with some sellers, it’s considered impolite to actually use the toilet.

Or, if the owners already have moved, the water may be turned off. And that could be, ummm, awkward.

2. Dig Around in the Closets

OK, don’t actually go through the owner’s stuff, but take a close look to assess how much storage space there is, and decide if it’ll meet your needs.

“People don’t like to open closets because they think it’s rude, but if you’re buying the house, it’s one of the biggest investments,” says Myler. “You want to make sure there’s enough room for everything you need.”

Before you step foot in a single house, take inventory of your current storage space, and know how much you’d like your next home to have.

3. Poke Around the Attic and Basement

Don’t just stick your head inside and call it good. Give the basement and attic a thorough investigation. If there are belongings piled against the wall, request they be moved before a second viewing.

“I get very nervous when I see a packed basement and stuff against the wall,” says Kyle Alfriend, lead agent of The Alfriend Group in Dublin, Ohio.

That’s because hidden walls and ceilings can conceal water damage, including peeling or discolored paint, rotting wooden accents, or a white, chalky substance on the wall, which indicates water intrusion.

As for the attic, a quick glance should tell you what you need to know. Are there rat droppings? Molding wood? Or is it generally clean, even if dusty? BYO flashlight for an enlightened examination.

4. Meet the Neighbors

Sorry, introverts. There’s no better way to get a read on the neighborhood than by directly asking the actual neighbors. Pop by their home and strike up a chat.

It’s a two-fer: Not only might you get valuable information about the area — from the noisy bar on the street behind you to eager babysitters on the block — but paying attention to their attitude speaks volumes about your potential relationship with your maybe-neighbors. Do they seem excited to meet you? Or are they standoffish?

“It’s not what they answer, but how they answer that will be very illuminating,” says Myler.

5. Be an Amateur Investigator

Anything seem fishy? Take your suspicions to city hall. If there are additions, pull the permits or get help from your buyer’s agent. You certainly don’t want to be responsible for tearing out that beautiful porch because the previous owners didn’t comply with the law.

Also, check the certificate of occupancy and any easements — especially if you’re hoping to make any major changes. Both are public record. An easement simply gives someone the right to use property they don’t own. Often that other someone is your local government that needs it for public services, such as water.

Myler remembers a friend who purchased a home with the goal of building a pool, only to find out an easement for the sewer line cut directly through the middle of the yard.

Another common use is a shared driveway, such as when one homeowner has to pass through another homeowner’s property to reach their home.

6. Ask Questions

If your sleuthing finds something concerning, don’t panic.

“Many times, there’s stuff that, at first glance, is real scary,” says Alfriend. “Often people will write off a house without digging into it, but there’s usually a perfectly logical, understandable reason, and it’s not a problem.”

Say you find a gaping hole in the drywall. It might be a huge red flag — or they might have rambunctious kids they absolutely plan to clean up after.

“Boys can wrestle and put a foot through the thing, and it’s 30 minutes before a showing,” Alfriend says. There’s not much the sellers can do at that point.

With any problem, your first step is simple: Ask.

Looking to buy or sell a home?

Chris Lee and Rusty’s Team at RealtySouth 205-233-5183


Print                           RS-BH-RED-Transparent               team photos

How to Dream Big About Your Outdoor Space (But Keep It Real)

Design Ideas That Stand the Test of Time

A firepit with a white bench with accent pillowsImage: A Beautiful Mess

House hunting? Envision the possibilities for backyards with these design ideas.

A funny thing happened this summer after leveling out the backyard. For the first time since moving into my house, I actually began to picture my dream backyard space. And the truth is, I have a long way to go.

For myself and plenty of other first-time homeowners, it seems to be a little easier to picture the future potential of interior spaces, like where the Christmas tree is going to go during the holidays, what hardwoods might look like instead of ugly carpet, etc. But if you’re anything like me, being able to see a yard’s future potential just doesn’t come to mind as easily.

I think it’s mainly because where the interior typically has defined areas and specific functions, the yard often starts as more of a blank slate (or in my case, a mess that has to first be cleaned up before a blank slate is possible). As a result, I wound up constantly second-guessing my outdoor project plans, putting them off, and taking years longer than I probably should have to get started.

If I could go back in time, I would have started on my dream yard a lot sooner. But now that I’ve had the opportunity for some trial and error, I can now see what I was missing all along. The key to adding the wow factor for a beautiful backyard is actually quite simple: divide and conquer.

1. A Place for Storage

When I first bought my house, I had no idea how important the space in my one-car garage would be. Even though I do an annual cleanout, it’s just not enough space for renovation supplies, outdoor equipment, paint, power tools, and lumber. The items I need for the interior upgrades compete for storage space with the equipment to maintain a healthy lawn and garden, leading to one massive mess that I’m constantly stepping over (and bumping my shin into).

Through years of organizing the interior spaces, I’ve learned a key lesson in home improvement: Make the space around you work for how you live your life.

I know that sounds like strange and obvious advice, but it isn’t until you live in a space for a little while that you realize what your habits are. Many times, new homeowners, including myself, will work toward a design that is totally wrong for them, focusing on how it “should be” and neglecting the reality of their everyday needs.

If you have an aunt who has that formal living room that never gets used, you’re plenty familiar with this concept. She’s basically paying for hundreds of square feet of underutilized space, heating and cooling it, and for what? A nice couch that the family never sits on?!

This same lesson works for outdoor spaces: It’s about how the space gets used today, tomorrow, and a year from now. Have a place for gardening tools, the mower, etc., in an easy-to-reach and well-organized location, and the existing space is much more efficient.

A white pegboard with tools in a garageImage: The Ugly Duckling House

The garden improves by force of habit because you’ll be going out there more often, working in your garden more often, etc. Since I’ve used just about every possible square inch of my garage, my next big project will be building my own outdoor storage shed, ideal for gardening and related equipment.

The design of the structure will be custom, but I’m taking heavy inspiration from fellow bloggers, like “Finding Silver Pennies.” Rather than just serving as a dumping ground for extra stuff, this shed is more like an extension of the home’s design. I love the idea of adding trim, decorative hardware, and little garden boxes!

2. Room for Entertaining

When I moved into my house, there was one space that I knew would need an upgrade: the 8-by-10-foot slab leading out from my kitchen and into the backyard. Prepare yourself for a hideous photo in 3 … 2 …  1 …

A concrete slab outside a sliding door with a white chairImage: The Ugly Duckling House

It’s my only true space for placing outdoor furniture at the moment, and even though it got a little bit of a makeover a few years ago (below), what I really want to do is expand this space for more guests and entertaining (just two seats aren’t going to cut it!).

A wicker chair on a concrete slab with two blue potsImage: The Ugly Duckling House

For a while, I thought that I might have to hire help to expand the patio or bust up the concrete, but that might not be necessary. Kelly from “View Along the Way” came up with a great DIY option for her slab-turned-wooden deck, which I think is a genius option!

Before: Like mine, it wasn’t much to look at:

After: No more stepping down onto discolored concrete:

A newly built wood deck outside of a red doorImage: View Along the Way

By building a new deck (or extension) over existing concrete, I have the option to expand the area as a whole. I’ll have to add some supports in expanded areas, but it beats having only 80 square feet of space for furniture. Guests won’t be crowded, and I’ll be more inclined to actually use this area rather than constantly avoiding it.

3. A Beautiful Garden

It’s hard to plan for a beautiful garden if you have a habit of killing indoor plants. If you too have a black thumb like I once did, take it from me: There’s hope! The secret is to pick plants that are either native to the area or to the natural climate you live in, which allows the plants you pick to thrive — even if they’re eventually neglected (ahem, guilty!). In the southeastern U.S. where I live, that means plants like hydrangeas, azaleas, and gardenias.

A blue hydrangea with green leavesImage: The Ugly Duckling House

Local nurseries and home improvement stores often carry plenty of options that do well in your climate (and the less exotic choices are often the most affordable plants, too).

I’ve also found that raised garden beds have been the easiest to start with since they help deter weeds and provide plenty of quality soil for growing. They can even help cover neighbor-neglected fences, like the one to the right of my property. There was nothing I could really do about a fence that I didn’t own, but I could try to dress it up from my side!

Before: While I’m glad my neighborhood doesn’t have the added expense of an HOA, it does mean that neighbors have to work out problem areas amongst themselves. With a little creativity, I took a neglected fence and made it into something I liked.

An old, mossy wood fence with patchy grassImage: The Ugly Duckling House

After: By adding some low-maintenance garden beds along one side of my yard, I created a spot that would eventually fill in with a living, flowering hedge.

A garden bed against a fence with brown mulch and plantsImage: The Ugly Duckling House

The plan is to later expand on this concept with the rest of the yard once the new deck and shed are in. These two additions will open the door for creating new gardening spaces next to each structure. I suppose I won’t get to call myself a black thumb for much longer!

4. Nighttime Lighting

I just love the idea of nighttime outdoor entertaining. Cozy seating, plenty of space for evening chatter, and the ambiance of delicate lighting make for a breathtaking space. Stefanie from “Brooklyn Limestone” has a great example of how to separate zones in the yard using outdoor lights (below). This small patio area is surrounded by a series of string lights suspended above, which separates it from the hammock and dining area nearby.

5. An Inviting Fire

Once the need-to-have things are in, it’ll be time to build some furniture and create a fire pit area for people to sit around and enjoy the new yard. There are lots of DIY options out there, and since store-bought kits for fire pits tend to be on the pricey side, I’m planning to use inexpensive concrete blocks, similar to how “A Beautiful Mess” created their awesome s’mores fire pit.

A firepit with a white bench with accent pillowsImage: A Beautiful Mess

After years of working on the interior, one tends to lose a little momentum and inspiration to keep the DIY train moving along. But transitioning my thought process to these exterior improvements has given me a serious boost in energy to continue making changes and hang on to my home improvement mojo.

New homeowners: Don’t make my same mistake! Start working on your yard as a process long before you think you’ll need to.

Now that I know the true potential waiting in my backyard, I can focus on making these dream outdoor zones into a reality. With any luck, this will be the year for lots of outdoor entertaining in a brilliant new space.


Looking to buy or sell a home?

Chris Lee and Rusty’s Team at RealtySouth 205-233-5183


Print                           RS-BH-RED-Transparent

team photos

© Copyright 2018 NATIONAL ASSOCIATION OF REALTORS®

8 Low-Maintenance Upgrades You’ll Love

Low-maintenance fiber-cement siding

You can have a virtually chore-free home with these easy-care materials.

Image: Stl Siding Pros

Homeownership should be about enjoying your home — not being a slave to it. The trick is to choose materials and products that make maintaining your home a snap.

Here are eight projects that’ll give your home a gorgeous makeover — and give you your weekends back.

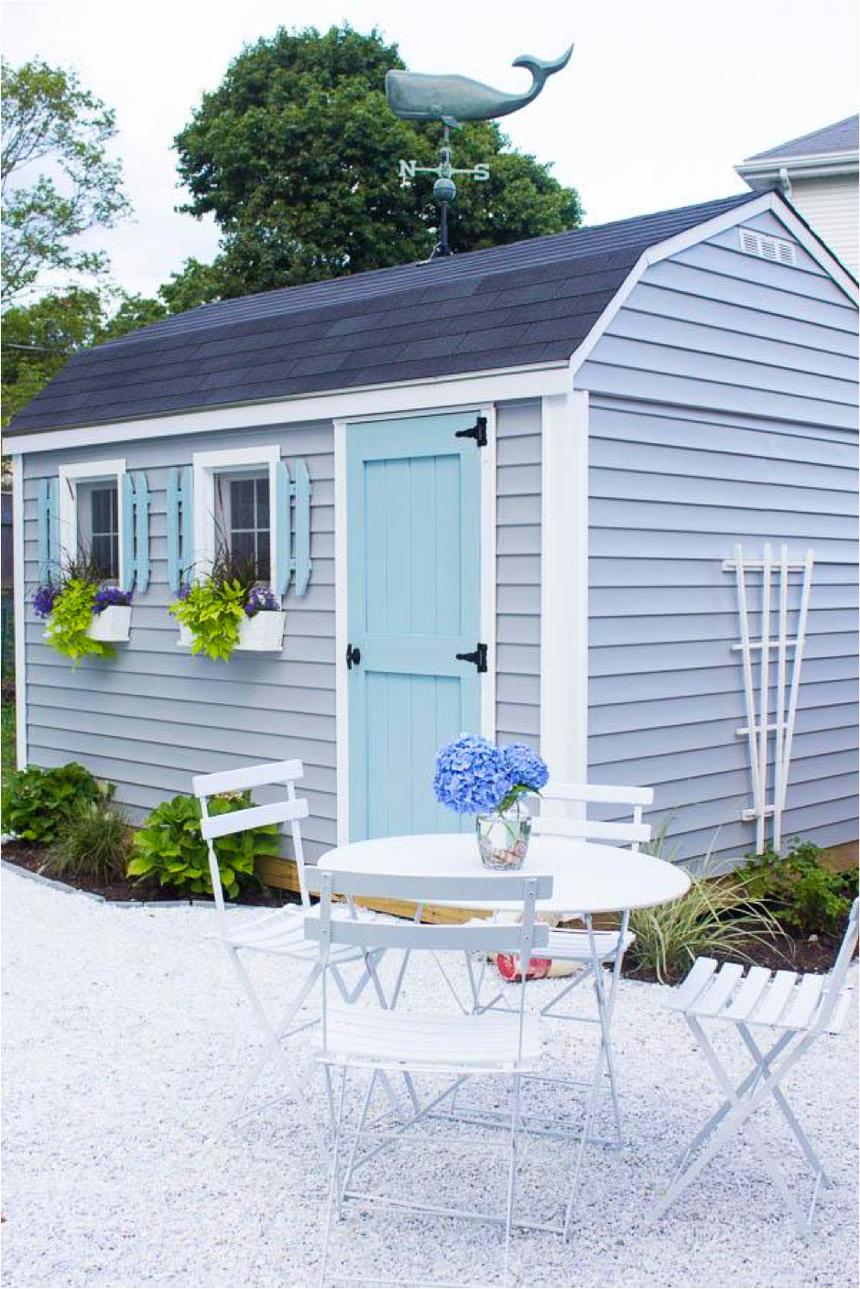
#1 Swap Out Your Siding With Fiber-Cement

Fiber-cement siding is the curb appeal champ that seems to never age the way wood does. It comes in a variety of shapes and forms: horizontal lap boards, shingles, and vertical board-and-batt style. Simulated wood graining is nearly indistinguishable from the real thing at about half the cost.

Why it’s low-maintenance: Tough, long-lasting fiber-cement siding is dimensionally stable when the weather changes, which puts less stress on paint finishes, helping preserve those good looks for years (and letting you enjoy a big reduction in upkeep). It’s also rot-, fire-, and insect-proof. Warranties range from 30 to 50 years.

Newer versions feature durable, baked-on paint finishes guaranteed to last 15 years. That means less repainting and touch-up work than wood siding, reducing the time and money you’d spend on routine maintenance. And unlike vinyl siding, fiber-cement takes paint well if you should decided to change colors.

Life expectancy: 50+ years; 15 years on pre-painted and finished siding

Maintenance cycle: Repaint every 15+ years.

Cost: $5 to $11 per square foot, installed.

The next-best thing: Vinyl siding is low-cost (about 20% to 40% cheaper than fiber-cement), never needs painting, and is rot- and insect-proof. It’s also lightweight and easy to install, which helps keep installation costs low. It has an expected lifespan of about 35 years.

However, it isn’t fireproof, nor does it take paint well, which means you’re limited to the colors offered by the manufacturer.

#2 Switch to Metal for a “Forever” Roof

Low-maintenance metal roofImage: Tali Hardonag Architect / Photo: Paul Keller Media

Metal roofing is one of the toughest, most maintenance-free roofing materials made. In addition to the traditional standing seam panels — the ones with ridges running from the peak to the eave — today’s metal roofing includes products that mimic slate, clay tiles, and wood shakes.

Metal roofing also is extremely fire-resistant — in a fire-prone area, having a metal roof may qualify you for a discount on homeowners insurance.

Why it’s low-maintenance: Most metal roofing comes with a 40- to 50-year warranty, and the replacement cycle is almost three times longer than that of three-tab asphalt shingles.

Look for baked-on enamel finishes with rust-proof undercoating that are warranted for the life of the product. The finish won’t crack or shed like asphalt, meaning you won’t be scooping those little granules out of the gutter every spring and fall.

So you know: There are two types of rust-proof undercoating. For reliable protection from rust, The Metal Roofing Alliance recommends:

  • For galvanized zinc undercoating: A galvanizing thickness level of at least G-90.
  • For Galvalume undercoating: Thickness level of AZ-50 or AZ-55.

A metal roof does cost about two to three times more than asphalt shingles. But that doesn’t account for the benefits you reap by not having to repair or replace as often. Here’s to your many maintenance-free weekends.

Life-expectancy: 50+ years

Maintenance cycle: Repair or repaint every 50 years.

Cost: $3.50 to $11 per square foot, installed.

FYI: Most metal roofing is made with steel, but homeowners in coastal areas should choose aluminum products to protect against rust.

Steel and aluminum are recyclable.

The next-best thing: Concrete tile just sounds tough, doesn’t it? Bingo — it’s resistant to wind, hail, water, fire, and pests, and often comes with a lifetime warranty against defects and performance failure. Concrete tiles often outlast the building they cover.

Caveat: It’s heavy; you’ll need your roof structure evaluated by a building engineer to make sure it can support the added weight. Retrofitting a roof to carry concrete tile can add $1,000 to $10,000 to the cost of installation.

Cost: $4.50 to $10.50 per square foot, installed.

#3 Get Handsome Easy-Care Floors with Laminate

Laminate plank flooring gets the nod here for its ease of installation (it’s a good DIY project), relatively modest cost, and easy-peasy maintenance. We like that it can mimic natural stone and exotic hardwoods like koa and rosewood for a fraction of the cost.

Why it’s low-maintenance: Laminate flooring has a tough, clear plastic wear layer that resists scratches, moisture, and stains; it never needs refinishing during the life of the product. Some are reinforced with aluminum oxide, one of the hardest compounds known. Laminates also are dimensionally stable, so seams won’t open up during changes in temperature and humidity.

Depending on the thickness and composition of the plastic coating, warranties range from 15 to 50 years. Some manufacturers offer lifetime warranties against staining, fading, and wear.

Life-expectancy: 25+ years

Maintenance cycle: Sweep or vacuum as needed; use water sparingly when cleaning.

Cost: $1 to $7 per square foot; add $2 to $5 per square foot for professional installation.

#4 Choose Quartz Countertops — They’ll Never Stain

Almost 80% of designers responding to a recent survey from the National Kitchen and Bath Association said quartz countertops are their top choice. In addition to being long-lasting, quartz counters come in many colors and unique patterns to go with any motif. It’s composed of about 95% quartz particles with resin binders (quartz is one of the hardest naturally occurring substances). It’s about the same price as granite.

Why it’s low-maintenance: Quartz is tough, durable, antimicrobial, and scratch-resistant. It’s almost impossible to stain, and it cleans up easily. It’s completely non-porous and never needs sealing. A 10- to 15-year warranty is standard; some manufacturers offer a lifetime guarantee.

Life-expectancy: 30+ years

Maintenance cycle: Occasional cleaning with mild soap and water.

Cost: $40 to $100 per square foot.

FYI: Quartz is an abundant natural resource. And old quartz countertops can be crushed and reused in new counters

#5 Replace Wood Windows With Fiberglass (No More Warps)

Fiberglass is moisture- and rot-resistant, and won’t warp like wood. They provide good thermal insulating properties. Plus they come pre-finished and look like real wood, or are painted in factory-applied finishes. And they’re cheaper than quality wood windows.

Why it’s low-maintenance: Fiberglass is dimensionally stable so it doesn’t warp even under extreme temperatures. Seams are bonded together and won’t separate or have gaps, so repairs are virtually non-existent. That means the window will operate reliably for years.

Fiberglass holds paint well — a good option if you’re looking to apply your own custom color. The fact that fiberglass doesn’t warp or shrink means paint finishes are long-lasting and touch-up work is rare.

Warranties range from 10 to 20 years, which includes the glass and glass seals.

FYI: The Department of Energy says that windows with an Energy Star label can help lower home energy costs by 7% to 15%.

Life-expectancy: 40+ years

Maintenance cycle: Clean as needed with water and mild detergent; repaint every 10 to 15 years.

Cost: $400 to $730 for a 3-foot-by-5-foot double-hung window, depending on options such as argon gas insulation and low-E coatings.

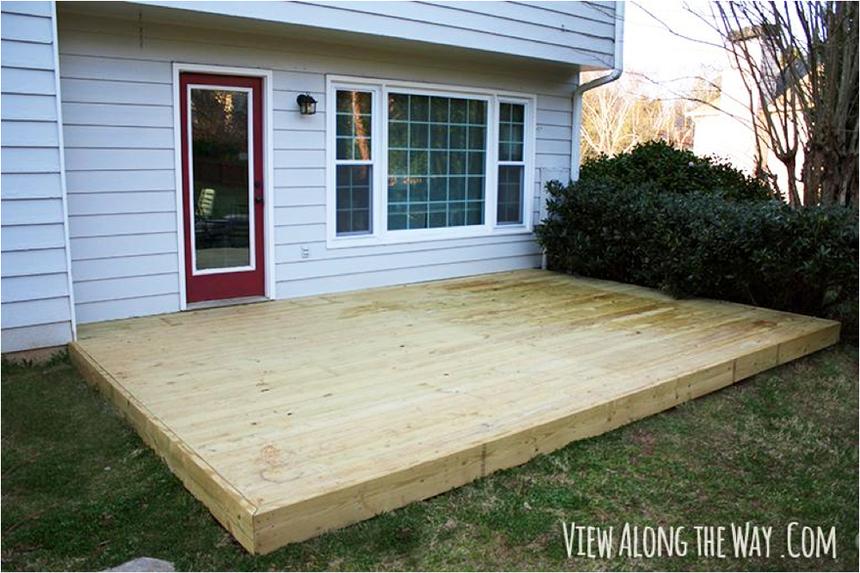
#6 Opt for Composite Materials to Never Seal a Deck Again

Low-maintenance composite deckingImage: Romanelli & Hughes Building Company / J.E. Evans Photography

Not so many years ago, composite decking looked about as natural as a used tire. No longer — today’s varieties do an excellent job of mimicking the color and grain patterns of real wood such as redwood, cedar, and even exotic woods like Brazilian walnut and teak.

Why it’s low-maintenance: Composite decking won’t chip, splinter, or fade. There’s none of the periodic application of deck cleaner or the refinishing required of wood decks. (On occasion, you’ll want to hose off dirt.) Composites won’t rot and are impervious to insect attack. Types with antimicrobial coatings won’t harbor mold and mildew. A 20- to 25-year warranty is typical.

Life-expectancy: 25 years

Maintenance cycle: Scrub with soap and water every two to three years.

Cost: $25 to $70 per square foot, installed.

FYI: A lot of recycled materials go into composite decking, including plastic bags, sawdust, and plastic milk jugs.

#7 Take Another Look at PVC for Porch and Deck Railings

Like a lot of imitation items made for outdoors, PVC railing systems for decks and porches have come a long way since the obviously fake systems of not so long ago. More companies have come into the marketplace with PVC aluminum, composite, and fiberglass products that do a good job of looking like well-crafted wood railings and balusters. Hidden fastening methods do away with some of the tackier connectors painfully visible on older systems.

Why it’s low-maintenance: PVC-capped aluminum railing systems are the best of both worlds — a rust-proof metal core and metal fasteners, all covered with weatherproof PVC. Factory colors are limited, but repainting and touch-up are banished.

Composites are good at looking like expensive woods, and they’ll never need staining or painting. Most systems are combos, with a composite sleeve that slides over a strong, pressure-treated wood post and pre-painted aluminum or composite balusters.

Warranties range from 15 to 25 years.

Life-expectancy: 50+ years

Maintenance cycle: Clean with mild soap and water as needed.

Cost: $15 to $60 per linear foot, depending on style and complexity.

#8 Add An Irrigation System That Knows When To Water (and When Not To)

A weather-sensing, water-conserving irrigation system waters your lawn and landscape plants without your input. It gathers local weather data and automatically adjusts output to provide the right amount of moisture for your landscape’s growing needs.

If you take off on vacation, an automated system continues checking weather conditions and applying the proper amount of water to your trees, shrubs, and lawn.

Some automated irrigation controllers meet EPA guidelines; the EPA estimates that switching a clock-operated system to a weather-sensing, WaterSense-certified system saves the average homeowner 8,800 gallons of water each year. That’s good for the environment, and money in your pocket.

You’ll save on sleep, too. Program your system so that, while you snooze, sprinkler heads run during the wee morning hours, when temps are cool, evaporation is minimal, and water usage is optimized.

Why it’s low-maintenance: Although the system itself needs periodic upkeep, such as draining the lines in winter and occasionally fixing or replacing sprinkler heads, you’ll more than recoup your time by not having to water your plants yourself, dragging out hoses and setting sprinklers by hand.

Warranties include one year for parts, and up to 10 years for some wireless sensors.

Life-expectancy: 50+ years for pipes; five to 25 years for sprinkler heads and valves.

Maintenance cycle: Annual draining of irrigation lines; occasional replacement of sprinkler heads.

Cost: $2,500 to $6,900 for a sprinkler system covering 5,000 square feet; DIY kits for similar size run $1,400 to $1,800.

FYI: If a summer heat wave puts your community under water restrictions, you can program an automated system to comply.


Looking to buy or sell a home?

Chris Lee and Rusty’s Team at RealtySouth 205-233-5183


Print                           RS-BH-RED-Transparent

team photos
© Copyright 2018 NATIONAL ASSOCIATION OF REALTORS®

6 Tips for Choosing the Best Offer for Your Home

Woman reviewing house offer over the phoneSelling your home will go a lot smoother if you think of it as a business transaction and don’t let emotions get in the way. Image: © Masterfile

Have a plan for reviewing purchase offers so you don’t let the best slip through your fingers.

You’ve worked hard to get your home ready for sale and to price it properly. With any luck, offers will come quickly. You’ll need to review each carefully to determine its strengths and drawbacks and pick one to accept. Here’s a plan for evaluating offers.

1. Understand the process.

All offers are negotiable, as your agent will tell you. When you receive an offer, you can accept it, reject it, or respond by asking that terms be modified, which is called making a counteroffer.

2. Set baselines.

Decide in advance what terms are most important to you. For instance, if price is most important, you may need to be flexible on your closing date. Or if you want certainty that the transaction won’t fall apart because the buyer can’t get a mortgage, require a prequalified or cash buyer.

3. Create an offer review process.

If you think your home will receive multiple offers, work with your agent to establish a time frame during which buyers must submit offers. That gives your agent time to market your home to as many potential buyers as possible, and you time to review all the offers you receive.

4. Don’t take offers personally.

Selling your home can be emotional. But it’s simply a business transaction, and you should treat it that way. If your agent tells you a buyer complained that your kitchen is horribly outdated, justifying a lowball offer, don’t be offended. Consider it a sign the buyer is interested and understand that those comments are a negotiating tactic. Negotiate in kind.

5. Review every term.

Carefully evaluate all the terms of each offer. Price is important, but so are other terms. Is the buyer asking for property or fixtures — such as appliances, furniture, or window treatments — to be included in the sale that you plan to take with you?

Is the amount of earnest money the buyer proposes to deposit toward the downpayment sufficient? The lower the earnest money, the less painful it will be for the buyer to forfeit those funds by walking away from the purchase if problems arise.

Have the buyers attach a prequalification or pre-approval letter, which means they’ve already been approved for financing? Or does the offer include a financing or other contingency? If so, the buyers can walk away from the deal if they can’t get a mortgage, and they’ll take their earnest money back, too. Are you comfortable with that uncertainty?

Is the buyer asking you to make concessions, like covering some closing costs? Are you willing, and can you afford to do that? Does the buyer’s proposed closing date mesh with your timeline?

With each factor, ask yourself: Is this a deal breaker, or can I compromise to achieve my ultimate goal of closing the sale?

6. Be creative.

If you’ve received an unacceptable offer through your agent, ask questions to determine what’s most important to the buyer and see if you can meet that need. You may learn the buyer has to move quickly. That may allow you to stand firm on price but offer to close quickly. The key to successfully negotiating the sale is to remain flexible.

© Copyright 2018 NATIONAL ASSOCIATION OF REALTORS®